Showing posts with label Tricks for Samsung. Show all posts

Sunday, December 1, 2013

How to Charge Corby 2 Phone Using Computer/Laptop

By 123inztructor on 9:14 PM
For this post I will show you how can you;

  1. Charge your corby 2 phone if you do not have a charger
  2. Charge your corby 2 phone if your charger is broken
  3. Charge your corby 2 phone using laptop, computer and other appliances and devices.
How to Charge Corby 2 Phone Using Computer/Laptop

Please continue reading the article here [ CLICK HERE ]


Is this post useful to you, then Link to us!
To link to this page from your website, simply cut and paste the following code to your web page.

Wednesday, October 16, 2013

How to Easily Take a Selfie Photo Using Your Corby 2

By 123inztructor on 7:14 PM
For this post I will show you how to take photos of yourself so easily using your corby 2 phone. You don't need to do it using a mirror. Yes! also don't need to touch the camera button while trying to project the camera lens to you (which is a little hard to do) just to be able to take a photo. Using this technique, you will not just be a photographer taking photos of your friends because you can join them on the picture that you are taking. To be able to do this follow the simple steps below.

STEP-BY-STEP PROCESS

1. Press your Corby 2 Menu button and find your Camera icon and click on it.

Corby 2 camera icon


2. Now press the GEAR icon or the Settings.


3. Press the [ OFF ] designated for the Timer.

Corby 2 camera settings for timer


4. Inside the TIMER option, you will find there the OFF, 2 seconds, 5 and 10 seconds. If you are taking only a selfie photo (photo of your self), I would suggest using the 5 seconds. But if you are more than 2, then use the 10 seconds to be able to prepare yourself to go to the position where the lens of your Corby 2 camera is projected.

Corby 2 camera timer options


5. Just press the kinda E button to save your Settings. See the image below.

saving the corby 2 camera option for seconds


6. Then you are now in the 5-second mode of taking a photo,as you can see on the image below, it is now set to 5 seconds.

corby 2 5-second mode for taking photos


7. Now using this mode, once you press the camera button you have 5 seconds to prepare yourself for the best pose and then point the camera of your Corby 2 phone projected to your face. Note, 5 seconds is the allotted time, so before that 5 seconds expire make sure you are already in your best pose. If you are finding it hard for 5 seconds, then use the maximum mode which is 10 seconds.


Well that's it! I hope this one will help you take photos not only for yourself but for others more easily. If you don't wanna get behind or don't just want to be the photographer, you can now join the photos you are taking by just setting your Corby 2 phone with a timer. Enjoy!

Is this post useful to you, then Link to us!
To link to this page from your website, simply cut and paste the following code to your web page.

Friday, May 10, 2013

How to Fix Corby 2 Infinite Restart Problem

By 123inztructor on 6:46 PM

For updated tutorial on How to Fix Corby 2 Infinite Restart Problem and download links visit here.


Sunday, March 17, 2013

Tricks for Samsung - How to Enable and Use Corby 2 Menus While on CALL

By 123inztructor on 1:09 AM
To be able to enable and use your Corby 2 phone MENUS while you are on a live call, follow the simple steps below.


Tricks for Samsung - How to Enable and Use Corby 2 Menus While on CALL STEP 1
First of all make a TEST CALL, you can call or make a TEST NUMBER if you wanted.


Tricks for Samsung - How to Enable and Use Corby 2 Menus While on CALL STEP 2
While you are on a call "long press" the POWER/LOCK KEY of your Corby 2 Phone. See the image above for more clarification of where to find the POWER/LOCK KEY.


Tricks for Samsung - How to Enable and Use Corby 2 Menus While on CALL STEP 3
After pressing the POWER/LOCK KEY, the IN-CALL FUNCTIONS will appear. See the image above.


Tricks for Samsung - How to Enable and Use Corby 2 Menus While on CALL STEP 4
Now press the MENU KEY to enable your MENUS and to be able to use it while you are on a call.


Tricks for Samsung - How to Enable and Use Corby 2 Menus While on CALL STEP 5
As you can see on the image above, the Corby 2 MENUS are enabled and usable while I am on an active call. I encircled the PHONE icon on the image above as a proof.


IMPORTANT NOTES

  • Be sure that you first let the one you are calling that you are going to do the steps given above, he or she might get irritated if you will not let him or her know that you are doing something on your phone while on call.
  • To be able to deactivate the Corby 2 MENUS while on call, just LONG PRESS the power/lock key once again.
That's it, hopefully this simple trick for samsung corby 2 will be an additional knowledge for you as a Samsung Corby 2 user like me. God bless always pals.


Is this post useful to you, then Link to us!
To link to this page from your website, simply cut and paste the following code to your web page.

Tuesday, February 26, 2013

Tricks for Samsung - How To Activate Fake Calls Corby 2

By 123inztructor on 11:03 PM
For today's post I will teach you how to make or ACTIVATE FAKE CALLS for your Samsung Corby 2 phone. The question is, why do you want to activate the fake call feature of your Samsung Corby 2 phone? The answers are the following;

Tricks for Samsung - How To Activate Fake Calls Corby 2
  1. You can use FAKE CALLS as an excuse if you wanted to live your blind date.
  2. You can also use FAKE CALLS to make someone call your number even though there is none.
To activate fake calls on your Corby 2 phone, follow the simple steps below.

step 1


Go to SETTINGS > APPLICATIONS > CALL > FAKE CALL.

step 2


In the FAKE CALL SETTINGS do the following :

FAKE CALL HOT KEY - Enable it by tapping it (it is enabled when the gray circle is colored green)
FAKE CALL TIMER - Set the timer to 5 SECONDS
FAKE CALL VOICE
  • Use fake call voice - Enable it also
  • Record voice - tap it to record your voice or anyone's voice
  • Play recorded voice - use it to preview your recorded voice
FACE CALLER ID
  • Name - Any name that you wanted for your fake caller
  • Number - Any number that you wanted for your fake caller
  • Fake caller image - any image that you wanted for your fake caller
step 3


Now tap SAVE to save your Fake call settings.

step 4


To activate your FAKE CALL, jut LONG PRESS the lower button of your Corby 2 VOLUME KEY. When a message saying "FAKE CALL ACTIVATED" appear, then your FAKE CALL will be activated at exactly after 5 SECONDS since you set the FAKE CALL TIMER into 5 SECONDS at STEP 2. If you are not familiar with the Corby 2 parts, you can read here. You can also activate your fake call even your Corby 2 phone is locked.

Now you can make fake calls using your Corby 2 phone. Hopefully this simple trick for samsung corby 2 phone will help you in some ways. God bless always pals!


Is this post useful to you, then Link to us!
To link to this page from your website, simply cut and paste the following code to your web page.

Tuesday, January 29, 2013

Tricks for Samsung - How to Capture Panorama Picture Using Corby 2

By 123inztructor on 4:50 PM
For this post, I will show you how to take photos using your Corby 2 phones in PANORAMA VIEW. By the way, what is a PANORAMA shoot kind of picture. A panorama shoot kind of picture is not available in all kinds of phones but good for us Corby 2 users our phone can do this function. A panorama view is like a landscape view, the width of an image is much broader compare to its height. See the image below.

Tricks for Samsung - How to Panorama Shoot Picture Using Corby 2 SAMPLE IMAGE
This image is courtesy of ravenstalon.blogspot.com

As you can see on the image above, that is a sample of a panorama style of view. Now I will show how to capture an image with a panorama view using your Corby 2 phone.


1. Go to MENU > CAMERA

2. In the SHOOTING MODE (the rectangle icon located on the upper left of your camera menu) select PANORAMA.

3. In the SELECT DIRECTION;

Tricks for Samsung - How to Capture Panorama Picture Using Corby 2 DIRECTIONS
  • If you are taking a panorama picture from left then select the direction going to the RIGHT.
  • If you are taking a panorama picture from right then select the direction going to the LEFT.
  • If you are taking a panorama picture from up then select the direction going DOWNWARD.
  • If you are taking a panorama picture from down then select the direction going to the UPWARD.

4. Assuming that you selected to capture a panorama image from left to right. Then press the arrow at RIGHT. After pressing that arrow a YELLOW GREEN LINE SQUARE will appear.

5. Now press the CAMERA button located at the middle-right of the Corby 2 screen. Then move your camera from LEFT to RIGHT SLOWLY. Yes it should be done slowly so that the picture will not be blurred.

6. When you think you capture all the views you wanted to be seen in your panorama picture, press the SAVE located at the lower right screen of your Corby 2 phone (the button that looks like an E facing downward).

7. When you see the captured panorama image preview. Just once again press the SAVE button to save your picture.

That's it. I hope you will enjoy doing this one cause I do. This trick for samsung corby 2 is just based on my personal used of my corby 2 phone. Hopefully this one helps you. god bless always pals.


Is this post useful to you, then Link to us!
To link to this page from your website, simply cut and paste the following code to your web page.

Friday, November 30, 2012

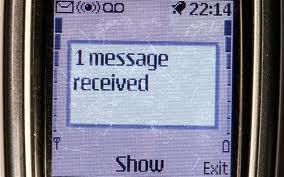
Tricks for Samsung - Your Corby 2 Phone Cannot Receive Message

By 123inztructor on 1:29 AM
Some of the common things you don't expect that will happen on your samsung corby 2 phone is the day that it cannot receive any text messages. The situations are maybe the following :

1. You cannot receive text messages from any of your contacts and even yourself.
2. You cannot receive text messages from just a single contact but the other contacts' text messages are fine.
3. You can receive text messages but they are coming very late or delayed.
4. The first message is received fast but the next messages are not.


The situations above are some of the undeniable facts of situations that each and everyone of us samsung corby 2 users are encountering sometimes in our lives. Its like a disease that accidentally strikes out of nowhere. In order for us not to panic I wrote some detailed information on how to resolve the situations above based on my personal experience of using my samsung corby 2 phone. These information are also applicable to other cell phones or mobile phones.

First of all is "You cannot receive text messages from any of your contacts and even yourself.".
Here are the proven reasons why you can't :

Your phone signal is bad - most of the time when we are too busy of doing something and then somebody text us unexpectedly we are not going to notice that our phone is out of signal. Sometimes we are not in our house and we went to a place that phone towers cannot reach clearly.

Your network has encountered technical problems - this can be another reason why you do not receive any text messages.

Secondly, "You cannot receive text messages from just a single contact but the other contacts' text messages are fine."

There is just one reason why you cannot receive any text messages from just a single contact but the other contacts' text messages are fine, you know why? Well the answer is YOU ACCIDENTALLY BLOCKED THAT PARTICULAR CONTACT. Yeah! you read it right and clear. As you can see in our samsung corby 2 phone when you are inside a text message, you will find there the Delete at left, the 3 dots (...) at the middle which is the Settings and the Back at right. The Settings on the other hand when you press it, you will be presented my 9 menus. And first on the list is the BLOCK BY ADDRESS. For so many times while answering the text of my girlfriend, I always accidentally pressed BLOCK BY ADDRESS. And when you do not know what BLOCK BY ADDRESS means, that could be disastrous for that sender because once you blocked a number you will not be able to receive any text from that number. To unblock a that contact follow the tutorial here.

Third, "You can receive text messages but they are coming very late or delayed."

The reason for this one is maybe you're signal is not that good or stable or also your network provider.

Last but not the least, "The first message is received fast but the next messages are not".

For the last problem it also goes the same with the third problem.

The information I shared above are all based in my personal experiences with text messages issues. I just shared theme to you in a sort of additional information. Hope they can be a guide for you guys. Good health and God bless always!

Is this post useful to you, then Link to us!
To link to this page from your website, simply cut and paste the following code to your web page.

Wednesday, October 31, 2012

Tricks for Samsung - How to Access In Call Functions Corby 2

By 123inztructor on 6:07 PM
Now I will share you some important key functions of your samsung corby 2 phone. This is how to access the "IN CALL FUNCTIONS" of your samsung corby 2 phone.


You can never avoid the situation that when your having a conversation on your samsung corby 2 phone someone will text you. And if you're new in using your corby 2 phone you will either want your phone conversation to end, or say to the person you're talking to that "Someone text me!" and you are going to end an important conversation.

Now when you knew you samsung corby 2 In Call functions, you can send a text message even though you are currently under a phone call.

Here's how...

Simple STEPS :

1. Locate your samsung corby 2 LOCK key or the ON and OFF key. This key is located at the upper right side of your corby 2 phone. For for familiarization of your corby 2 phone parts click here.

2. Now when you're on a phone call or just make a test call to a phone number. Just Hold press the key on step 1. And the picture on the left will appear.

 Note that the picture on left is an actual call I made to my girlfriend. The IN CALL functions the the six menus on the bottom of the picture. These functions are the :

a. Access to Keypad while in call
b. Access to Contacts while in call
c. End call function
d. Access to Speaker while in call
e. Mute function
f. Headset bluetooth function


Access to Keypad while in call
The first menu on the in call function is use to access the Keypad.


Access to Contacts while in call
The second menu on the in call function is use to access the Contacts.


The End Call function
This is the third menu on the in call function. It is use to end or terminate a call.


The Speaker Function
The fourth in call function is use to make the person you're talking to voice loud and can also be hear not only by you at also the people near you. The Loud Speaker function for short.


The Mute Function
Use to mute the voice of the person you are talking to.


The Headset Bluetooth function
The last function for the in call function. Honestly, I never used this headset bluetooth function before and I really don't know how it functions.


That's the six In call functions for your samsung corby 2 phone. This simple tricks for samsung corby 2 phone is definitely known to others. But hopefully this can be useful to those who doesn't knew this trick yet. Take care and God bless always pals!

Is this post useful to you, then Link to us!
To link to this page from your website, simply cut and paste the following code to your web page.

Wednesday, October 17, 2012

Turn your Android into a Remote - Send Message from Phone to Computer

By 123inztructor on 11:33 PM
Now imagine sending a free message from your samsung corby 2 phone to your computer or laptop. Another cool trick isn't it?

Sending a message from your phone to computer is another built in feature of mobile witch remote control. And its very simple to do.

For you to be able to do this Turn your Android into a Remote - Send Message from Phone to Computer you must first do this tutorial,click here. And also please note that even though I am using my samsung corby 2 phone here as an example of phone used you can also do this trick to other types of phones or cellphones as long as they support Java applications.

Now when you're done doing the tutorial given on the link above, proceed to the steps below.


1. On the Mobile witch remote control main cpanel select Utilities and press OK. See the image on the left.


2. On the Utilities control panel select Send Message option and press OK to continue. Please excuse my image on the left run command is the selected and not the Send message.


3. Now just type your message on the text field and press Done when you are done typing in your message. This message will be instantly sent on your computer once you have pressed Done. For my image example I typed "A message from my phone".


4. Once you have pressed Done the "A message from my phone" will now appear on the center of your screen. Cool trick once again courtesy of your mobile witch remote control app.


This is the last tutorial for Turn your Android into a Remote and hopefully you've learned a lot while doing all the trick tutorials. Thank you for patiently reading and following all our tutorials, tricks, tips, themes, wallpapers and ring tones. We promise to continue serving you quality services for free on this public service blog. Take care and God bless always pals. Cheers!

Is this post useful to you, then Link to us!
To link to this page from your website, simply cut and paste the following code to your web page.

Turn your Android into a Remote - Controlling Windows Run command

By 123inztructor on 10:57 PM
Now we are going to do the trick of running or opening a program using the Run command function of our mobile witch remote control.

As you can see on the image at the left, if you are a Windows Xp, Vista, 7 user you knew how to use the Run command. But can you imagine using that Run command directly using your samsung corby 2 phone? Sounds great and cool isn't it?

On the other hand this trick is also applicable and can be done using other types of phones or cell phones. As long as your phone supports Java apps and you can install the mobile witch remote control on your phone. We all knew that Java applications commonly has the extension of JAR or JAD. So if your phone supports this type application then lets proceed to doing the trick.

First of all you will need to finish the first trick tutorial here. This contains all the installations of your remote control on your computer and phone, all the needed applications and device, etc.. Once you're done do the steps below.


1. On the Mobile witch remote control main cpanel select Utilities and press OK. See the image on the left.


2. Now inside Utilities you are given two options to choose. Select the Run command and press OK to continue.


3. Now for my example on the image at the left, I tried to open a text editor Notepad on my computer using my mobile witch remote control on my corby 2 phone. So I just typed in Notepad and press Done.

Immediately after pressing Done a Notepad will pop up and open on your computer.


You can also try the following Run commands.
  • calc - calculator
  • cmd - command prompt
  • dxdiag - directx diagnostic
  • control - control panel
  • desk.cpl - display properties
  • mspaint - paint
  • winword - word
  • powerpnt - powerpoint
  • regedit - registry
  • msconfig - configuration
  • For more Run commands follow this link : 175 Run Commands For Windows XP
That's it! Hope you enjoy doing this trick Turn your Android into a Remote - Controlling Windows Run command. Take care and God bless always pals. Cheers!


Is this post useful to you, then Link to us!
To link to this page from your website, simply cut and paste the following code to your web page.

Tuesday, October 16, 2012

Turn your Android into a Remote - Corby 2 Controlling Windows Media Player

By 123inztructor on 3:40 AM
This "Turn your android into a remote trick for corby 2 Controlling Windows Media Player" is not the main part of this trick. In order to do this trick you must first do the main methods. Click here for the tutorial.

The application available for the Application mode of the mobile witch remote control is the Windows media player.

Just like the Winamp and VLC player, Windows media player is one of the application that we control using our samsung corby 2 phone.

To be able to do this trick do first the given tutorial link above because this is not the first part of the trick.

Controlling your Windows media player on your computer using only your samsung corby 2 phone or any other phones or cell phones that supports Java apps is kinda cool and very helpful.

Now let's go down to business.


1. On the Mobile witch remote control main cpanel select Application Mode and press OK. See the image on the left.


2. Now go to Windows media player, select it and press OK to go to the control panel of your Windows media player.


3. When you're on the control panel you will see the following commands or functions.

Play/Pause - use to play or pause a media
Stop - use to stop a media
Previous - use to go back and play the previous media
Next - use to go to the next media
Fast Forward - use to play a media more faster than normal
Volume Up - use to increase Windows media player volume
Volume Down - use to decrease Windows media player volume
Mute - use to mute Windows media player volume


So simple isn't it? Hopefully you gather some important tricks for this post and apply it for your convenience. This tricks and tips are some of the things I knew and currently applying on my samsung corby 2 phone. This trick is also applicable for all phones or cell phones that supports Java apps and mobile witch remote control can be install.

Is this post useful to you, then Link to us!
To link to this page from your website, simply cut and paste the following code to your web page.

Monday, October 15, 2012

Turn your Android into a Remote - Corby 2 Controlling Winamp Player

By 123inztructor on 4:19 PM


This "Turn your android into a remote trick for corby 2 Controlling Winamp Player" is not the main part of this trick. In order to do this trick you must first do the main methods. Click here for the tutorial.


Just like the previous applications I discussed for our mobile witch remote control, the next Windows application we are going control using our samsung corby 2 phone is the Winamp media player.


To start with this trick be ware that you must first do the tutorial given on the link above to be able to do the following methods. Saying that you already did, proceed to the following steps below.


1. On the Mobile witch remote control main cpanel select Application Mode and press OK. See the image on the left.


2. For the next step, select Winamp and press OK to continue.


3. Now that you're on the control panel of your Winamp. You can now use your samsung corby 2 phone to control it.

Play - is use to play a media
Pause - use to stop specific event or time of a media
Stop - use to stop a music
Previous - use to go back and play to the recent media being played
Next - use to play the next media on the list
Volume Up - use to increase the volume of the Winamp player
Volume Down - use to decrease the volume of the Winamp player


That's it. Please do note that even though I am using my samsung corby 2 phone as example here, you can also use your own phone or cell phone for this tutorial. As long as your phone or cell phone supports Java apps wherein you can install the mobile witch remote control.

This tricks are just based on my personal usage of my samsung corby 2 phone. Hope this can be a help for you. Cheers!

Is this post useful to you, then Link to us!
To link to this page from your website, simply cut and paste the following code to your web page.

Sunday, October 14, 2012

Turn your Android into a Remote - Corby 2 Controlling VLC Player

By 123inztructor on 12:07 AM
This "Turn your android into a remote trick for corby 2 Controlling VLC Player" is not the main part of this trick. In order to do this trick you must first do the main methods. Click here for the tutorial.

This trick is another application available for you to control using mobile witch remote control on your samsung corby 2 phone, the VLC player.

Controlling a music player using your corby 2 phone is another cool thing you can do to maximize the usage of your corby 2 phone.

Now to continue doing this trick you must have completed the tutorial link given above. So when you're done about that tutorial proceed to the steps below to start controlling your VLC player using your corby 2 phone or any other phones or cell phones as long as your phone supports Java applications.


1. On the Mobile witch remote control main cpanel select Application Mode and press OK. See the image below.


2. Now on the applications list of your mobile witch controller control panel, select VLC media player and press OK.


3. On the main control panel of your VLC media player you will found the following functions that you can use to control and navigate your VLC media player using your phone.

Play/Pause - will play and pause your VLC media player

Stop - use to stop a media

Previous - use to go or play previous media

Next - use to play or go to the next media

Volume Up - use to increase your VLC media player volume

Volume Down - use to decrease your VLC media player volume

Mute - use to mute your VLC media player volume

Full screen - use to view your VLC media player on a whole screen mode of your computer.


Note that the eight functions above are controlled using your corby 2 phone or any types of phone that supports java and mobile witch remote control can be installed.

This cool trick Turn your Android into a Remote - Corby 2 Controlling VLC Player are another application that can be controlled using your phones or cell phones. Hope this will help you also for future uses. Cheers!

Is this post useful to you, then Link to us!
To link to this page from your website, simply cut and paste the following code to your web page.

Saturday, October 13, 2012

Turn your Android into a Remote - Corby 2 Controlling Powerpoint

By 123inztructor on 4:39 PM
This "Turn your android into a remote trick for corby 2 Controlling Powerpoint" is not the main part of this trick. In order to do this trick you must first do the main methods. Click here for the tutorial.


This ability of mobile witch remote control is one of the coolest, since using your corby 2 phone, you can present your Powerpoint presentations. By just the press from your corby 2 phone you can proceed to the next slide or go back to the previous slide.

To do this trick be sure you have done the tutorial first on the given link above. Then proceed to the steps below.

1. On the Mobile witch remote control main cpanel select Application Mode and press OK. See the image below.


2. For the next step select Powerpoint and press OK. See the image below.


3. Now that you are in the Powerpoint control panel on your corby 2 phone you will see the image below.


As you can see on the image at the left, we have main functions that are the most used functions to present a powerpoint presentation even using the keyboard of your computer.

Next Slide - is use to navigate your powerpoint presentation to go to the next slide if there is any

Previous Slide - is use to go back from the previous slide you viewed

End Show - is use to end your power point presentation


Note that the three functions above are using your corby 2 phone. But this trick is also applicable to other types of phones or cell phones as long as your phone supports Java apps.

Hope this Turn your Android into a Remote - Corby 2 Controlling Powerpoint helps you guys and can be a way for you to present a powerpoint presentation using your phone or cell phone only. Its kinda cool isn't it? Well good luck and God bless always pals! Cheers!


Is this post useful to you, then Link to us!
To link to this page from your website, simply cut and paste the following code to your web page.